

Electric bikes have revolutionized personal transportation, offering eco-friendly mobility with power assistance. However, the increased speed and weight of e-bikes make effective braking crucial for rider safety. This comprehensive guide will help you understand, select, maintain, and troubleshoot your e-bike braking system for optimal performance and peace of mind.
The Core Mechanics of E-Bike Brake Systems
E-bikes ride at higher speeds and carry heavier loads than regular bikes, so require powerful braking systems. Understanding how such systems operate is crucial for maintaining them properly and using them safely.
When you squeeze your brake levers, the system converts that hand pressure to stopping power via either friction-based systems (hydraulic and mechanical systems) or energy conversion (electronic regenerative braking).
The performance of your brakes is based on the correct alignment of components, adequate friction material, and clean surfaces of contact. A properly serviced braking system acts immediately to the input, with confident control under all conditions of riding.
Types of E-Bike Brakes: Choosing Your Stopping Power
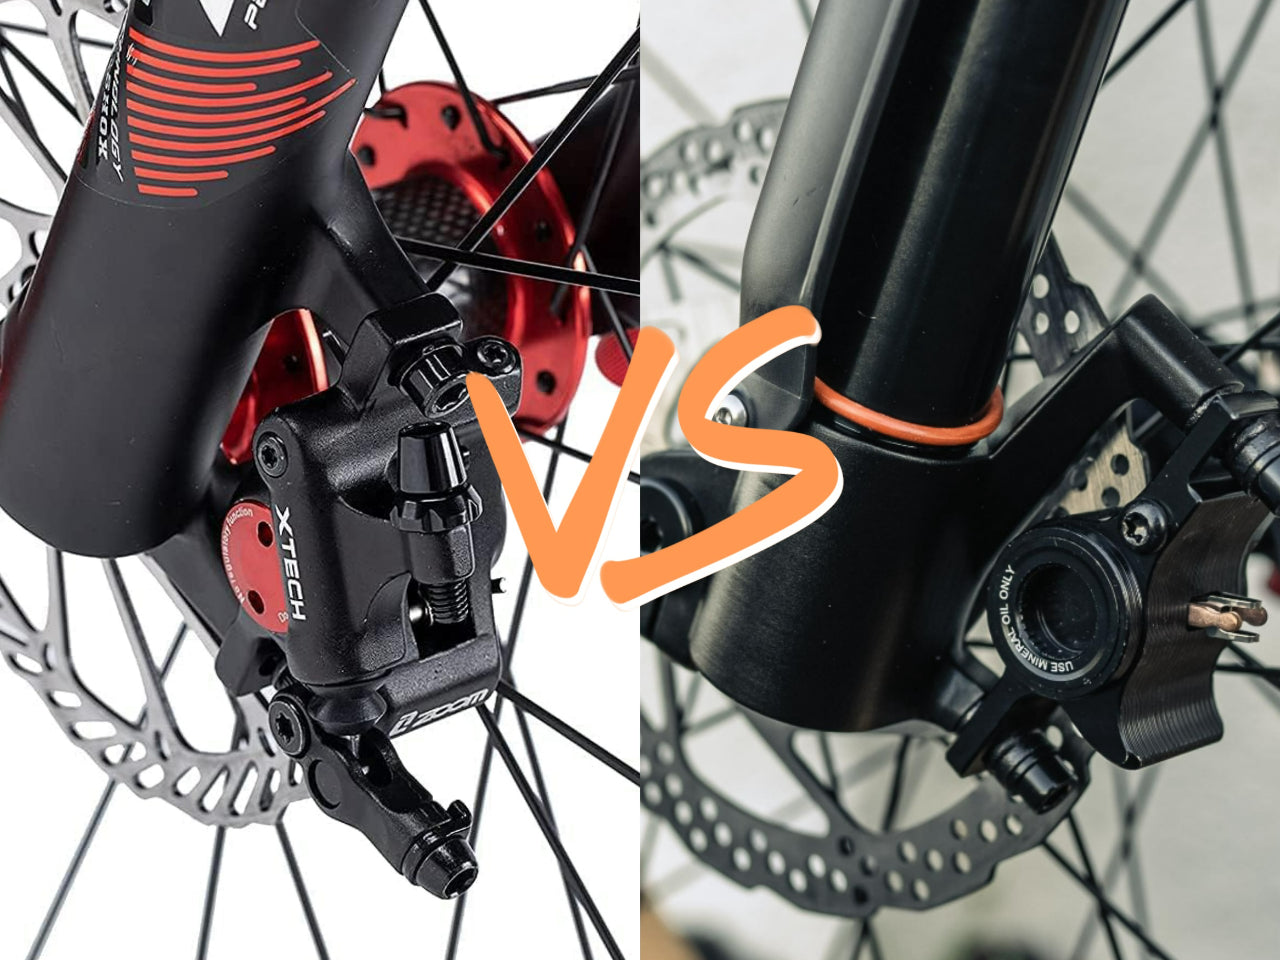
Mechanical Disc Brakes: Reliable Simplicity

Mechanical disc brakes use cables to transfer force from the brake lever to the caliper, which then presses the brake pads against a rotor attached to the wheel hub. These systems are widely used for their accessibility and straightforward maintenance.
| Aspect | Details |
| Cost | Lower initial investment and replacement parts |
| Maintenance | Can be performed with basic tools |
| Performance | Good in most conditions but requires more hand force |
| Adjustability | Manual adjustment needed as pads wear |
| Best For | Budget-conscious riders, DIY enthusiasts |
Hydraulic Disc Brakes: Premium Performance

Hydraulic systems use brake fluid to transfer force from the lever to the caliper, creating stronger, more consistent braking with less hand effort. This technology offers superior modulation and reliability.
| Aspect | Details |
| Cost | Higher initial investment |
| Maintenance | Requires specialized tools for bleeding |
| Performance | Excellent in all conditions with minimal hand force |
| Adjustability | Self-adjusting as pads wear |
| Best For | Performance riders, technical terrain, heavier e-bikes |
Essential E-Bike Brake Maintenance: Keeping Your Stopping Power Sharp
Weekly Quick Checks
Developing a habit of quick pre-ride inspections can prevent most braking issues. Take a few minutes before significant rides to check:
- Brake pad thickness (replace when less than 1.5mm of friction material remains)
- Rotor condition (look for scoring, warping, or contamination)
- Lever feel (should engage with consistent resistance)
- Caliper alignment (pads should contact the rotor evenly)
Monthly Maintenance Tasks
Regularly more detailed monthly inspections help to identify possible problems before they can become safety problems. Clean the rotors using isopropyl alcohol and a lint-free rag to remove performance-robbing contaminants. Ensure all mounting bolts remain tight since vibration will eventually loosen connections.
For mechanical brakes, check cable tension and lubricate moving points with dry lubricant. Owners of hydraulic systems must check for fluid leaks and check lever stiffness—a spongy sensation indicates air in the system that needs to be bled.
Replacing Brake Pads and Rotors: The DIY Approach
When to Replace Components
Early wear part replacement prevents expensive damage to more costly parts. Replace brake pads when friction material is less than 1.5mm or when braking performance is significantly reduced. Rotors must be replaced when thickness falls below manufacturer's minimum spec (usually marked on the rotor), or when warping/scoring cannot be corrected.
Step-by-Step Pad Replacement Process
Brake pad replacement is the most common type of maintenance you'll be performing. Replacing them is extremely easy:
1. Acquire correct tools (hex wrenches, pad spreader) and appropriate new pads
2. Swing out wheel for more room (usually not necessary but handy)
3. Remove retaining pin or bolt securing pads
4. Remove old pads and clean caliper interior with a dry rag
5. Manually reset pistons within the calipers by pushing them back gently (with a plastic tire lever)
6. Install replacement pads with the friction side facing the rotor
7. Secure with the retaining mechanism and reinsert the wheel
After replacement, perform a gentle breaking-in procedure by doing 10-15 controlled stops from moderate speed. This deposits an even layer of pad material on the rotor surface for optimal performance.
Advanced Maintenance: Bleeding Hydraulic Brakes
Recognizing When Bleeding Is Needed
Hydraulic systems occasionally require bleeding to remove air bubbles that compromise performance. Signs that bleeding is needed include:
| Symptom | Cause |
| Spongy lever feel | Air in the system |
| Reduced stopping power | Compromised hydraulic pressure |
| Lever pulls closer to handlebar | Air compression in the system |
| Inconsistent braking | Air bubbles moving through lines |
Basic Bleeding Procedure Overview

While specific processes vary by manufacturer, the general process is these steps:
1. Position the bike in a suitable work stand
2. Pull out your brake manufacturer's bleed kit
3. Remove brake pads to prevent contamination
4. Connect the syringe to the caliper bleed port
5. Open lever reservoir or connect a second syringe
6. Bleed brake fluid through the system until bubbles are removed
7. Close all ports in the correct order
8. Clean thoroughly to dry any fluid that has spilled
9. Before pad replacement, test lever feel
First bleeders might consider watching make-specific video instructional videos before attempting this themselves since improper technique lets more air into the system.
Troubleshooting Common E-Bike Brake Issues
Noisy Brakes
Brake noise is often the first indicator of developing issues. Squealing or howling typically indicates contamination or glazed pads. Clean rotors with isopropyl alcohol and lightly sand brake pads with fine-grit sandpaper to restore proper function.
Grinding noises suggest more serious problems, including completely worn pads, foreign objects in the caliper, or contaminated pad material. Inspect thoroughly and replace components as needed rather than continuing to ride, as damage to expensive rotors can quickly occur.
Power and Feel Problems
As the braking performance declines, systematically check for these frequent causes:
1.Dirty or glazed pad material
2.Hydraulic fluid leaks or tube air
3.Rotors below minimum thickness
4.Misaligned calipers
5.Jammed or stuck caliper pistons
These issues are usually resolved with the above maintenance steps in most instances. In case of recurring issues, a professional bike mechanic can be referred to in order to avoid jeopardizing safety.
Safe Braking Techniques for E-Bike Riders
Mastering Modulation
Effective braking involves more than just stopping power—control is equally important. Practice controlled, progressive braking rather than sudden lever grabs. Apply brakes lightly to initiate slowing, then gradually increase pressure as needed, slightly releasing pressure just before coming to a complete stop for smoothness.
Weight Distribution During Braking
Your body position significantly impacts braking effectiveness. Shifting weight backward slightly when braking prevents over-the-bar incidents during hard stops. Keep your body relaxed rather than rigid to better absorb forces, and practice braking while standing for optimal control in off-road situations.
Adapting to Conditions
Different riding environments require adjustments to braking technique:
| Condition | Technique Adjustment |
| Wet surfaces | Begin braking earlier, apply lighter pressure |
| Loose gravel | Reduce front brake pressure, rely more on rear |
| Steep descents | Alternate between brakes to prevent overheating |
| Urban traffic | Cover brakes for faster response time |
Regular practice in varied conditions builds muscle memory that serves you well in emergency situations.
Upgrade Your E-Bike Safety Today
Braking on your e-bike is not just about performance–it's about getting you and others to safety on the road. By adhering to the maintenance routines contained herein, you'll enjoy reliable stopping power when you need it the most. Remember, routine inspection and early component replacement are investments in your safety that pay dividends with each ride.